How to resize logo in Microsoft Dynamics GP Word Templates
Getting used to the new Word Templates functionality can be a bit challenging at times. One of those challenges came in the form or a simple question: "How to resize the logo on the template?". One thing to keep in mind is that most objects on a Microsoft Dynamics GP Word Template document live inside of content controls. With that said, here are the steps to achieve this, taking the SOP Blank Invoice Form Template* as an example:
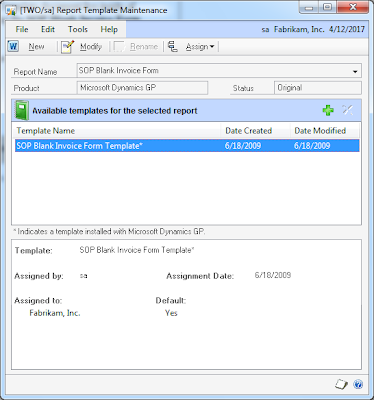
1. Under Report Template Maintenance, select the SOP Blank Invoice Form template from the More Reports list.
2. Click the New button to create a new template. For this example, we will create the template based on the existing template and we will call it SOP Blank Invoice Form Icon. Click Ok to continue.
3. Highlight the newly created template, then click the Modify button to open Microsoft Word.
4. Click on the Picture content control to add a logo image.
Note: This image must also exist in the Image library under Template Configuration.
5. Select the logo, right-click, and chose Remove Content Control.
6. Highlight the image and resize accordingly. The following is a sample of the resized image with some extra text to go along:
NOTE: The logo is part of the Header section of the document.
7. Save the modified template to a different directory where it can be imported from later on, for example, My Documents. Close Microsoft Word.
8. Back to Report Template Maintenance, click the Add Template button and select the newly modified template from the My Documents folder. Replace the existing one when prompted.
9. Click the Assign button, then mark the company you want to assign the template to. Then, click on Set as Default to make the new template the default template for the company. Click Save to continue. Click Save to continue.
NOTE: This will ensure that the copied version of the original template prints always.
Hope you found these steps simple to follow and that you are enjoying the new Word Templates feature in Microsoft Dynamics GP 2010.
Until next post!
MG.-
Mariano Gomez, MVP
Maximum Global Business, LLC
http://www.maximumglobalbusiness.com/


Comments
But can you tell me where the word forms are stored? I installed one on a user's machine but another user on another workstation cannot print the modified form. He keeps getting "cannot access report because the dictionary containing it is not loaded"
MG.-
Mariano Gomez, MVP
Thank you!
This is quite an old post, but the bit question that remains to me with the Word Templates, is how can you control and limit the size of the default logo witout pasting a "permanent" logo onto each template ? The benefits of the Word Templates vs. GP Reports is to not have to hard-code the logo on the template and remain flexible.. however, depending on the size of the original source file (JPG or PNG), the report can get a complete different layout when it is printed out..