Now that my good friend and fellow MVP,
David Musgrave has completed his
#MSDexterity Development Environment Series, it's only fitting that I follow it up with a new series on DevOps with
Visual Studio Team Services (VSTS) and Microsoft Dexterity.
Background
David's series is important, because it provides an overview of the processes involved in building a Microsoft Dexterity environment and touches upon certain aspects of the code packaging and deployment that are fundamental to DevOps. Keep in mind that no one method is wrong or right, but rather look at it as having a wide array of options at your disposal.
DevOps (Development and Operations) goes beyond the software development life cycle (SDLC) or building a development environment, to incorporate a delivery process that emphasizes communication and collaboration between the product management, software development, and operations teams. Primarily, it seeks to automate the process of software integration, testing, deployment, and infrastructure changes by establishing a culture and environment where building, testing, and releasing software can happen rapidly, frequently, and more reliably. We've always heard the cliched term, "People, processes, and technology" thrown around, but DevOps really focuses on bringing the three together.
Since people and processes are highly dependent on each organization, I cannot really cover those here and frankly, they are tons of resources online describing and expanding on the human and process aspects of DevOps. My goal with this series will be to see how we can leverage VSTS as the technology component for a Microsoft Dexterity development operation - mainly, Independent Software Vendors (ISVs), consulting partners, and last, but not least, customers who do have a Microsoft Dynamics GP development team. I suspect some of the principles outlined here will also apply to non-Dexterity development operations, but you need to be the judge as to what and what doesn't apply to your specific case.
I will also assume that most of you reading this will already have a Microsoft Dexterity development environment that relies on either
Visual SourceSafe (VSS) or
Team Foundation Server (TFS) as your source code control repository and that you are familiar with the concepts of code check-in and check-out.
Implementing Visual Studio Team Services in a Microsoft Dexterity Development Environment
I often get asked, "how do we get started with Visual Studio Team Services?". To put things in perspective, most Dexterity development teams asking this question are always concerned with compatibility between Microsoft Dexterity and Visual Studio Team Services. After all, their current source code control procedures with VSS and TFS have gotten them to this point with little to no issues. The first thing to know is, Microsoft Dexterity communicates to VSTS through the same TFS source control providers defined in the Source Control options. That's right! If you already connect to TFS, you can certainly communicate to VSTS.
Something else to keep in mind is, Microsoft Dexterity versions 12, 14, and 16 do allow you to use the TFS providers directly, this is, without having to install the Dexterity Source Code Control Services (DSCCS) component. Another reminder is, you will need to have the corresponding version of Visual Studio installed on the same machine with Microsoft Dexterity to work with Dexterity TFS provider of your choice. The following table describes the TFS provider and the corresponding version of Visual Studio need to support that particular provider.
TFS Provider
|
Visual Studio Version
|
|---|
| Team Foundation Server 2010 | Visual Studio 2010 |
| Team Foundation Server 2012 | Visual Studio 2012 |
| Team Foundation Server 2013/2015 | Visual Studio 2013 or Visual Studio 2015 |
Provisioning Visual Studio Team Services
The first thing you will need is to provision Visual Studio Team Services. For this, you will need to go to the
Visual Studio website. Once you are on the site, sign in with your organizational account (either Office 365 or Azure AD account).
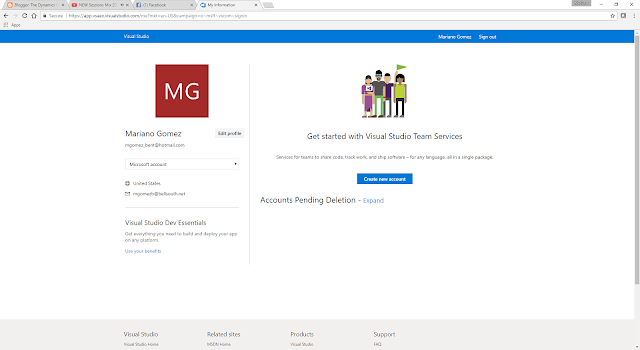
When clicking on Sign In, you will be challenged for your credentials and will take you to the Get Started page where you can setup your VSTS account. Click on the
Create new account button to continue.
 |
| Get Stated page |
On the Account Creation page, you will setup a project space to host all your Microsoft Dexterity projects and will use this address to administer all your development, QA, and operations users and teams and your Microsoft Dexterity projects as a whole.
 |
| Account Creation page |
You have a choice to manage your code using Git control or Team Foundation Version Control (TFVC). Git control allows you to setup a distributed source code control model, where each developer has a copy of the source repository on their dev machine; or a TFVC model, where, typically, team members have only one version of each file on their dev machines. Historical data is maintained only on the server. Branches are path-based and created on the server. For more information, take a look at this
comparison between Git and TFVC.
After clicking Continue, VSTS will provision your project workspace and your account. Upon completion, a default first project is created for you where you can describe what it's about and setup continues integration for your project (more on that later).
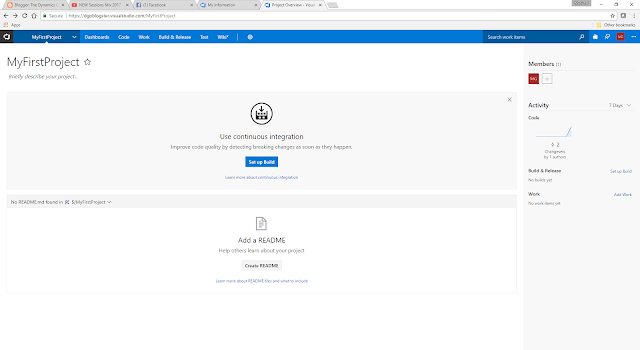 |
| MyFirstProject landing page |
Setting up a project using Visual Studio Team Services
The goal of this section will be to show you how to setup your first project using VSTS. The next article in my series will explain how to migrate your VSS and TFS projects to VSTS.
Since no one names their projects "MyFirstProject", it will be necessary to rename this to whatever name you choose. However, for all intends and purposes, let's say this will be our Microsoft Dexterity Quotes Enhancements project. To rename, the project, click on the gear button, and select Overview.
 |
| Overview option |
You can proceed to change the name of the project under the Profile section, then click the Save button to proceed. Team Services will then present you with a big warning, make sure you read through before you continue. However, since this is our first project and we have nothing else but an empty shell at this point, it is safe to continue with this process.
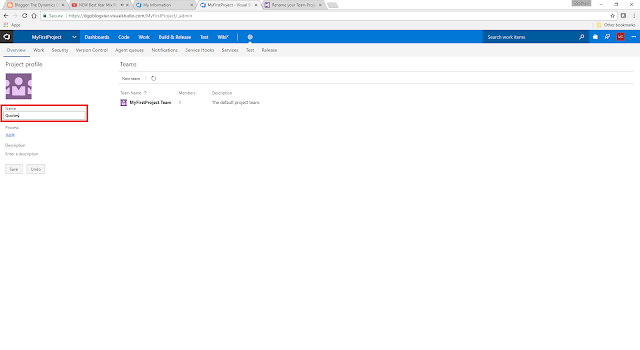 |
| Project profile page |
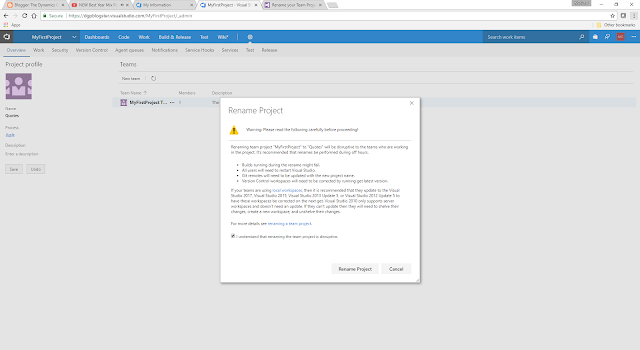 |
| Rename Project warning |
Once the renaming is successful, the profile page will automatically refresh, showing the new project name and the project team name accordingly.
Setting up the Team Services Project Server in the Visual Studio IDE
Since my team normally develops in Dexterity 12 (GP 2013), 14 (GP 2015), and 16 (GP 2016) as our products are supported on three different versions of Dynamics GP, it is necessary for us to have a version of Visual Studio installed that is supported by all versions of Dexterity simultaneously. We have settled on
Visual Studio 2012 with Update 5, which allows us to use the Team Foundation Server 2012 provider in all versions of Dexterity mentioned above, although we have side-by-side installations of Visual Studio 2012 and Visual Studio 2015.
Open Visual Studio 2012 and choose
Connect to Team Foundation Server on the start page.
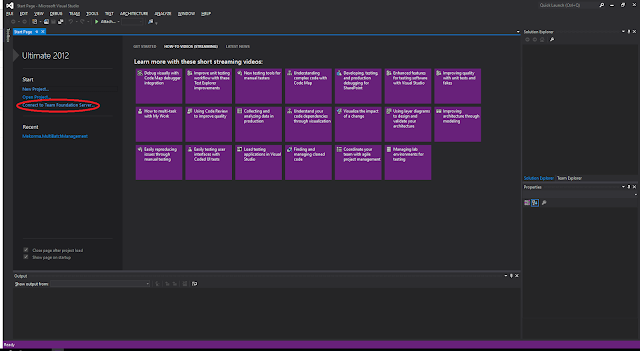 |
| Visual Studio 2012 Start page |
You will be challenged by Visual Studio to enter your credentials. Enter the credentials you used to provision your Team Services account.
Visual Studio will then take you to Team Explorer once the operation sign in operation has been completed. Proceed to click on Source Control Explorer to view the new project we've setup.
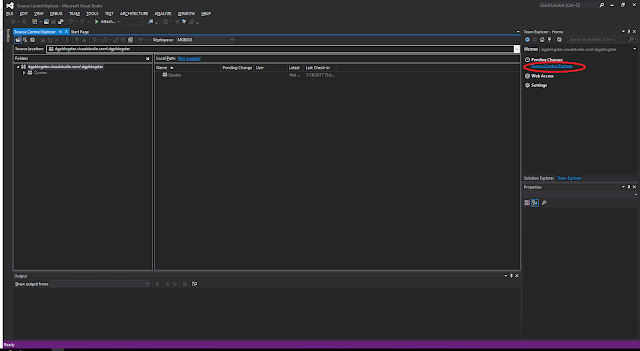 |
| Visual Studio Source Control Explorer |
In order to make this fully functional, we need to map our cloud repository to a local path. First, I suggest you setup the local folder using File Explorer. For this case, I will create a folder called MyProjects and under it, a new folder called Quotes. To map the cloud repository, select the root node of the repository, then click the
Not Mapped hyperlink above the details pane in Visual Studio. This will open the Map window.
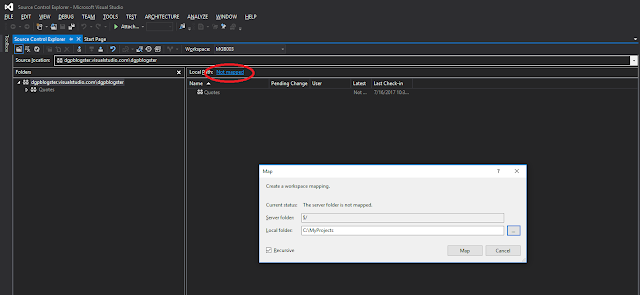 |
| Map window |
Point the folder location to the root folder, MyProjects on your local machine. Click the Map button to complete the operation. You will then be asked if you want to download the content of the repo onto your local machine. Since this is a brand new project, there will be nothing in the Quotes project folder (except for the Visual Studio Team Services build templates), so proceed to click Yes to continue. This will now setup the initial project folder.
Setting up Microsoft Dexterity Source Control
When working with integrating Dynamics GP applications, we typically start out from an empty Dynamics.dic development dictionary, but if you already have an existing project dictionary you would like to begin working with, in either cases the following steps will work.
In the case of our example, we will copy the Quotes_dev.dic development dictionary to the MyProjects > Quotes folder. For more information on setting up your development environment, please refer to
#Dexterity Development Environments – Part 2: Setting up Projects and follow up to step 10.
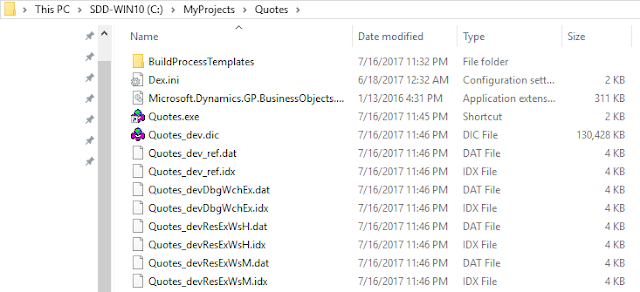 |
| Quotes_dev.dic development dictionary |
Next, we can launch Dexterity with the dictionary and the Dex.ini file by using our Quotes.exe shortcut. Note that our dictionary already has existing resources we have developed for this project.
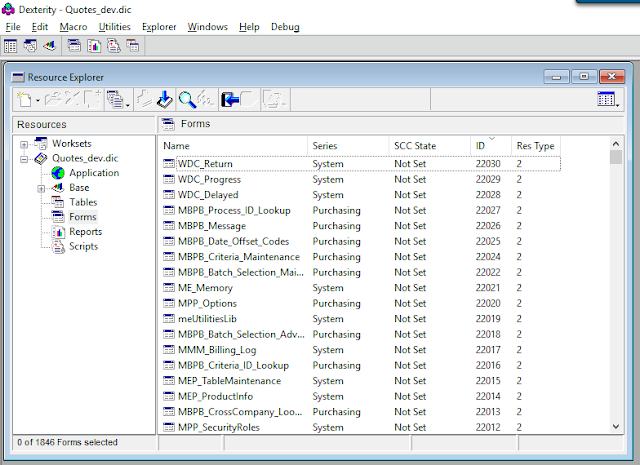 |
| Quote_dev.dic inside the Dexterity IDE |
To setup the Source Control information, we need to go to Edit > Options in the Dexterity IDE. At first, the provider option will be set to [Disabled]. We can then choose the TFS provider that matches our Visual Studio installation, in this case Team Foundation Server 2012.
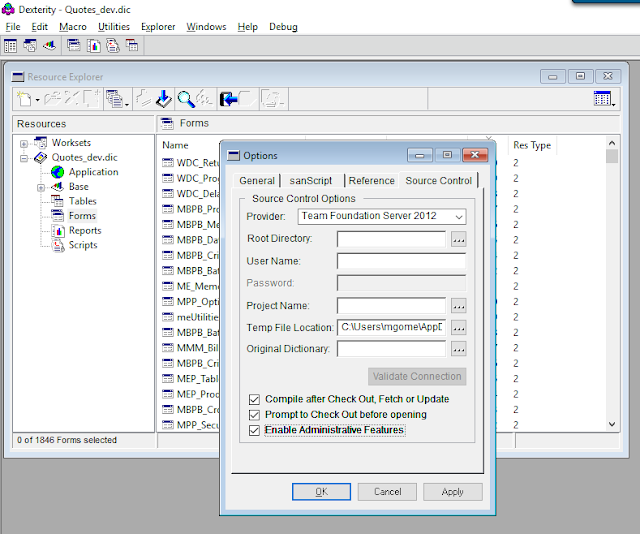 |
| Selecting the Source Control Provider in Options window |
The root directory, will correspond to the folder with the hierarchy immediately above the project folder, in this case the MyProjects folder created above.
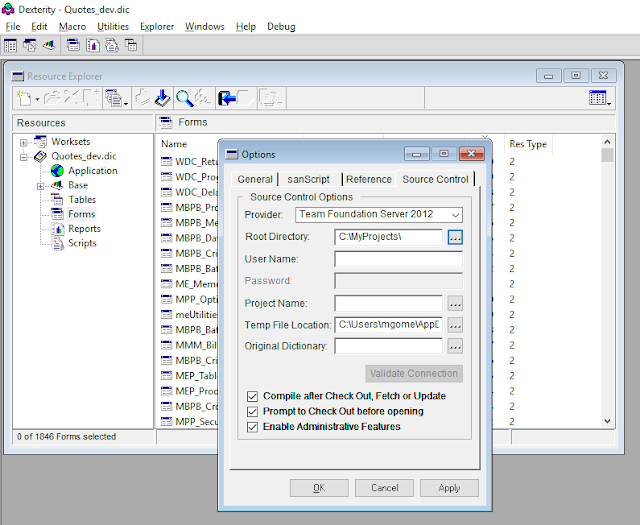 |
| Root directory setup |
Since Dexterity uses the TFS providers supplied with Visual Studio, it needs the credentials you use to access the repository. Enter that information in the User Name field. NOTE: the password field remains disabled.
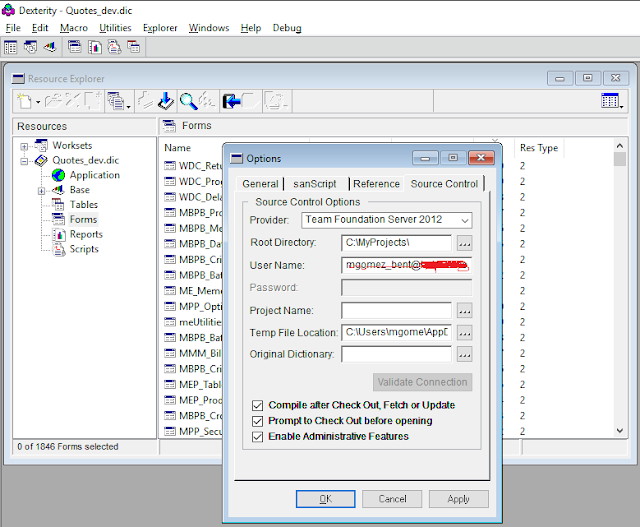 |
| User Name setup |
Click on the ellipses button next to Project Name to select the project (do not type). If you can select the project, then it means that Dexterity is communicating with your source control repository - and that's always a good thing :-)
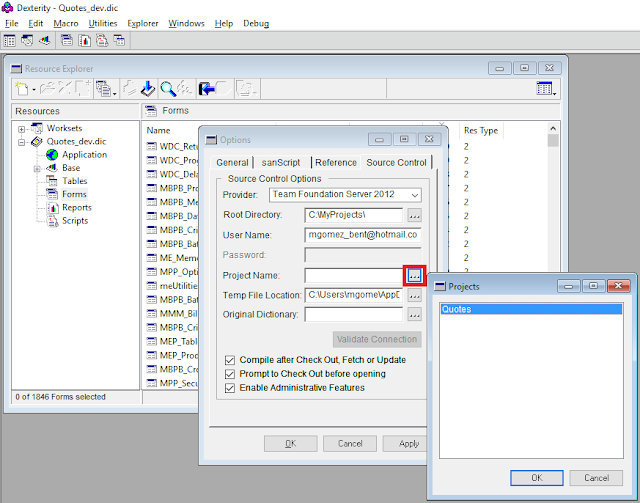 |
| Projects window |
Finally, point to the Original Dictionary for which your code was written. As a personal note, I keep a folder on my machine called Dictionaries, which contains sub folders hosting a clean dictionary for each version of Dynamics GP I develop for. This prevent me from accidentally removing, say, the Dynamics GP installation and not having a dictionary available, causing my Dexterity source code control to fail.
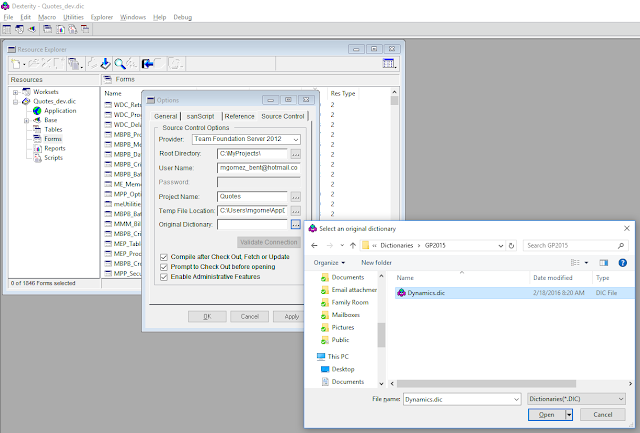 |
| Original Dictionary |
Synchronizing your dev dictionary with Visual Studio Team Services
To synchronize your development dictionary to the VSTS repository, you must first update your source code control state. This will allow Dexterity to determine which resources are new.
NOTE: New resources are defined by a resource ID of 22,000 and above. Alternate resources, will also appear as new to Dexterity source control.
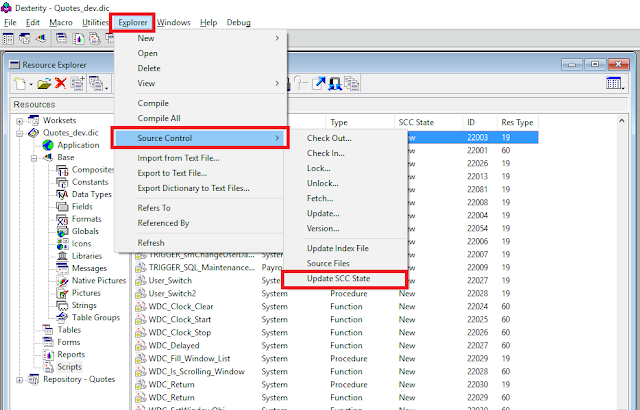 |
| Update Source Code Control state |
Once you update the source code control state, proceed to check in the resources into the repository. Choose Explorer > Source Control > Check In...
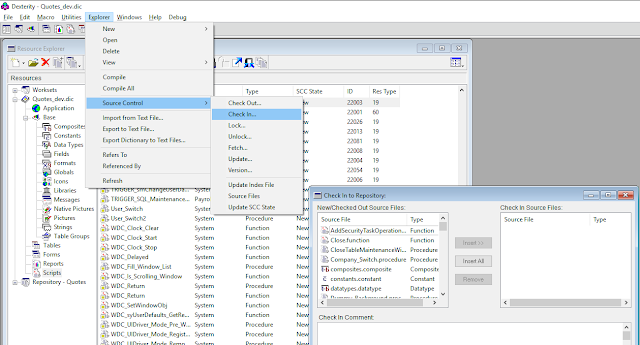 |
| Source code check in |
If you are going to check in all resources, click the
Insert All button. Be sure to enter a comment that describes the best you can what is being done, i.e., "Initial check in of Quotes project resources".
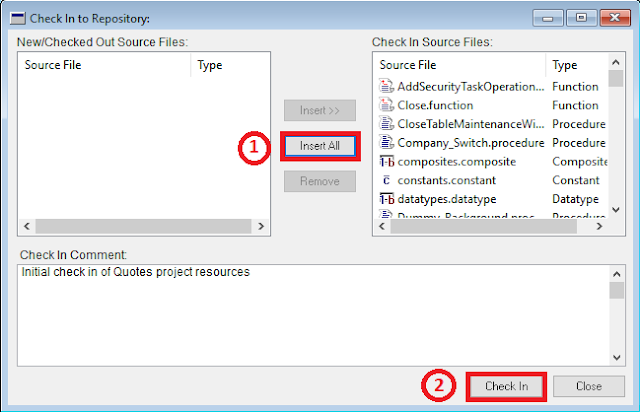 |
| Check in process |
Both Visual Studio Source Control Explorer and Team Services should reflect the checked in resources. You can also look to your hard drive, under the Quotes folder to see the new folders created for Base, Forms, Reports, Scripts and Tables resources.
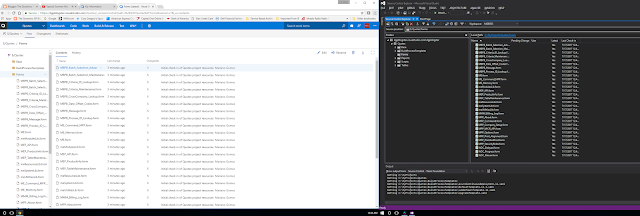 |
| Resources in Repository |
My next article will discuss how to migrate from VSS and TFS to VSTS.
Until next post!
MG.-
Mariano Gomez, MVP


Comments